Follow Me On Social Media!

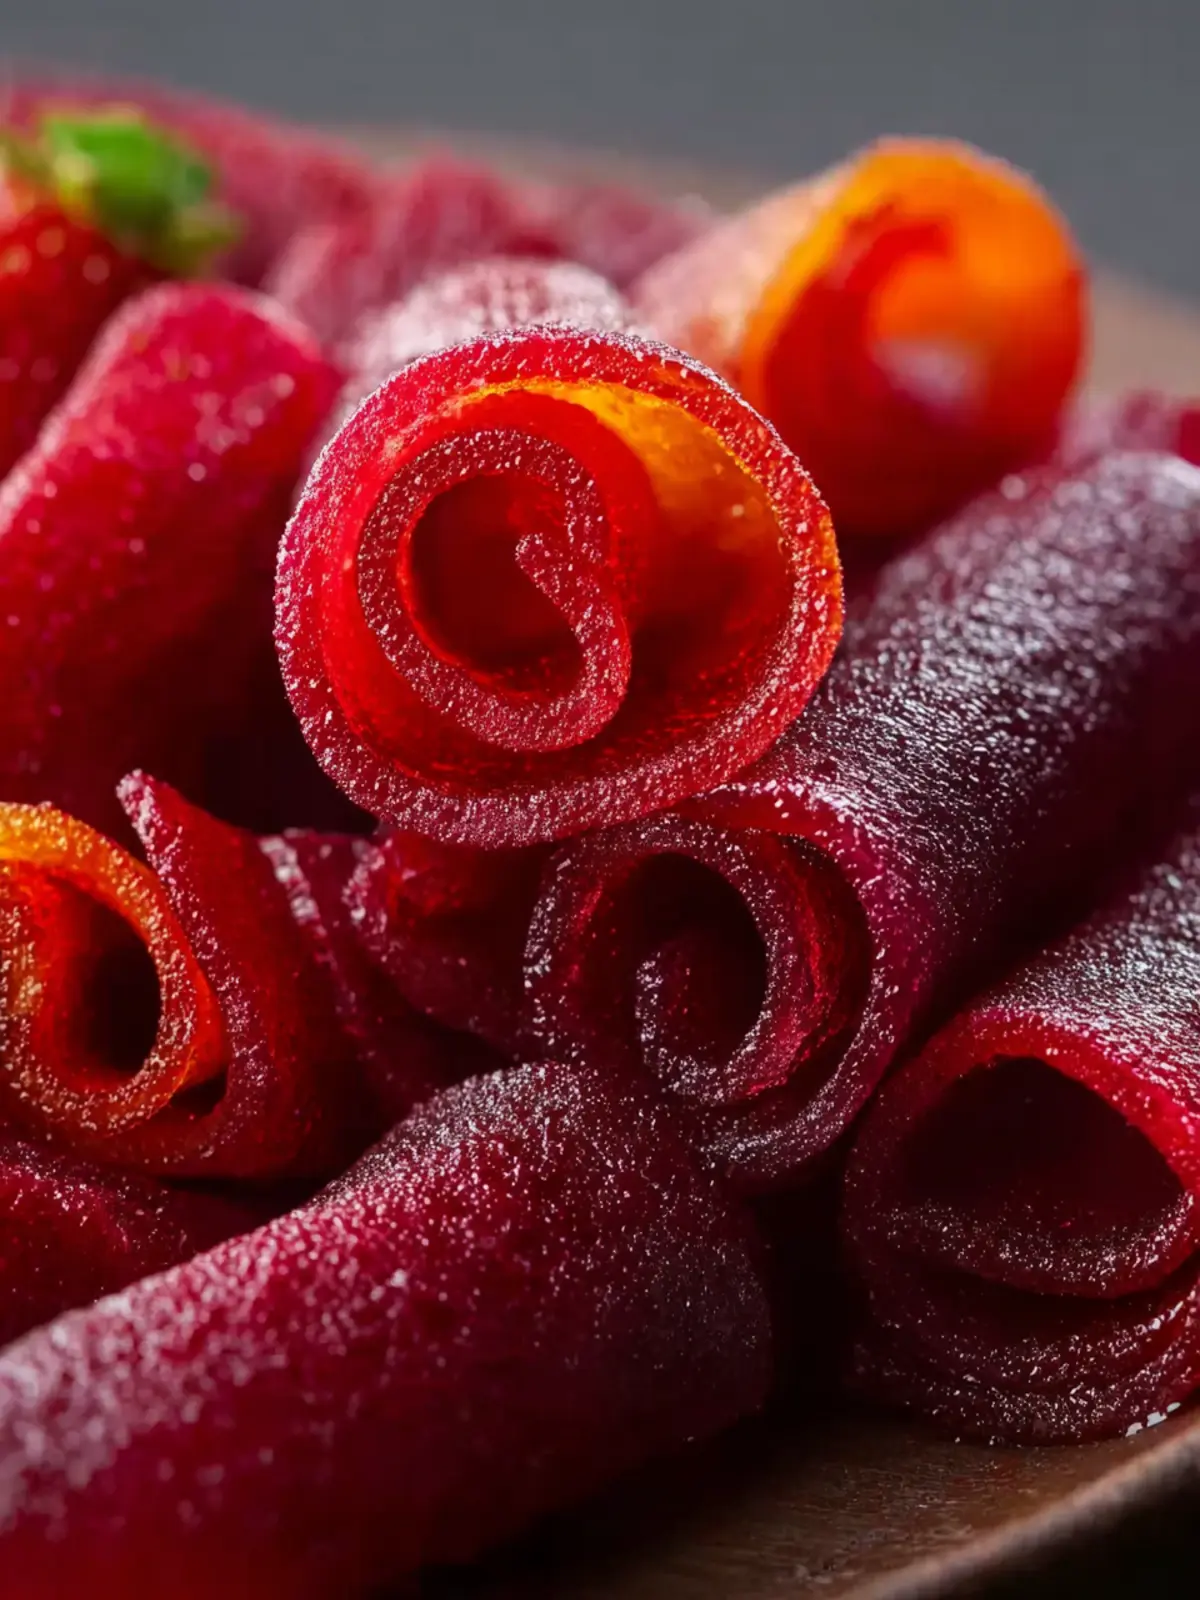
Homemade Fruit Roll Ups: Easy, Chewy, and Oh-So-Juicy!
Introduction to Homemade Fruit Roll Ups
Imagine the joy of biting into a sweet, chewy treat that takes you back to your carefree childhood—this is exactly what homemade fruit roll ups are all about. These delightful snacks, bursting with fruity flavor, are not only easy to make but also allow you to harness the nostalgic goodness of your favorite fruits. Whether you’re enjoying a road trip or just need an afternoon pick-me-up, a homemade fruit roll-up brings a sense of warmth and comfort that store-bought options often lack.
The beauty of crafting your own fruit roll ups lies in the control you have over the ingredients. By using fresh, ripe fruit, no added preservatives, and a touch of sweetness, you can create a snack that is both delicious and healthy. Best of all, the process is simple enough to invite the whole family to join in. Just imagine blending vibrant fruits, spreading them out, and watching them transform into a delightful snack as they dry.
How homemade fruit roll ups bring back childhood joy
Do you remember rainy afternoons spent in the kitchen, experimenting with flavors and textures? That’s the spirit of homemade fruit roll ups. With a little creativity, you can customize your roll-ups to capture the flavors of your favorite seasonal fruits. Some might prefer the tartness of raspberries, while others might indulge in the sweet and tropical taste of mangoes.
Making your own fruit roll-ups can also be a fun and engaging way to teach children about healthy eating. By involving them in the process—from choosing the fruits to spreading the puree—you’re not just creating a tasty snack; you’re fostering a life-long love for cooking and nutrition. Plus, envision the smiles when they relish their very own creation!
So, let’s embark on a journey into the colorful world of homemade fruit roll ups. It’s not just about enjoying delicious snacks; it’s about reconnecting with the joy of culinary exploration and savoring the simpler pleasures in life. Embrace the nostalgia, and transform your favorite fruits into delightful treats that can be cherished by both young and old.

Key Ingredients for Homemade Fruit Roll Ups
Creating homemade fruit roll ups is not just about the flavors, but also about choosing the right ingredients that contribute to their unique texture and taste. Here’s a breakdown of the essentials you’ll need for this delightful treat:
-
Fruits: The star of your homemade fruit roll ups. Fresh, ripe fruits like strawberries, mangoes, or apples provide natural sweetness and vibrant flavors. While frozen fruit is an option, fresh fruit yields a brighter, more intense taste.
-
Sweetener: Depending on the natural sweetness of your fruit, you may want to add a bit of honey or agave syrup to enhance the flavor without overpowering it. This is particularly useful for tart fruits.
-
Lemon Juice: A splash of fresh lemon juice not only brightens the flavor but also helps maintain the fruit’s color during the drying process.
-
Pectin (optional): For a slightly thicker consistency, you might consider adding pectin. It can help give your fruit roll ups a firmer texture and improve their longevity.
With just these key ingredients, you can create delicious, chewy snacks that are both healthy and satisfying!
Why You’ll Love This Recipe
Homemade fruit roll-ups are not just a snack; they’re a nostalgic bite of childhood wrapped in pure, fruity goodness. Imagine the joy of transforming fresh, vibrant fruits into chewy, flavorful treats that you can enjoy anytime. This recipe is simple, healthy, and customizable, making it a must-try for anyone looking to satisfy their sweet cravings in a wholesome way.
Wholesome Ingredients
Using natural fruits means you’re avoiding the processed sugars and additives found in store-bought options. The fruit you select becomes a reflection of your taste.
- Fresh Fruits: Whether it’s strawberries, mangoes, or apples, fresh fruits burst with natural sweetness and vital nutrients.
- Sweetener Options: Adjust the sweetness with honey, agave, or leave it out entirely, depending on your preference for tartness.
- Citrus Juice: A splash of lemon or lime adds brightness and helps preserve the color of your roll-ups, not to mention elevating the overall flavor.
Easy to Make
One of the best parts about homemade fruit roll-ups is how effortlessly they fit into your life. With just a bit of prep and some patience while they bake, you’ll have delightful snacks ready for school lunches, weekend hiking trips, or cozy movie nights at home. Plus, involving family or friends in the process makes it an enjoyable and engaging activity.
Elevate your snack game with these homemade fruit roll-ups! You’ll find they’re more than just a treat—they’re a versatile, healthy choice that everyone will love.

Variations on Homemade Fruit Roll Ups
Homemade fruit roll ups are a trend that has taken snack time to a whole new level. You can easily customize your fruit roll ups to match your preferences or mood, transforming a simple recipe into a variety of delightful treats.
Explore Flavor Combinations
Creating unique flavors is a delightful way to elevate your homemade fruit roll ups. Consider these fun combinations:
- Tropical Twist: Blend mango and pineapple for a bright, sunny flavor reminiscent of summer days. This refreshing mix will transport you to a beach, no matter the season.
- Berry Bliss: Combine strawberries, raspberries, and blueberries for a tangy-sweet blend. This is perfect for those who crave a bit of tartness in their snacks.
- Peachy Keen: Puree ripe peaches with a hint of vanilla for a sweet, aromatic treat that captures the essence of summer in every bite.
Infuse with Herbs and Spices
Don’t shy away from adding depth to your homemade fruit roll ups. A sprinkle of cinnamon or a dash of fresh mint can take your roll ups from ordinary to extraordinary, providing a surprise twist that keeps things interesting.
Mix in Extras
Experiment with incorporating extras like:
- Chia Seeds: Boost nutritional value and add a delightful crunch.
- Honey or Maple Syrup: For those with a sweet tooth, a drizzle can enhance the overall flavor.
Whichever variation you choose, these creative twists on homemade fruit roll ups will surely satisfy your cravings and impress your friends!
Cooking Tips and Notes for Homemade Fruit Roll Ups
When you’re ready to embark on your journey to crafting homemade fruit roll ups, think of it as an adventure in flavor and creativity. These chewy delights not only satisfy your sweet tooth but also offer a fun way to use up ripe fruits sitting in your kitchen.
Choose the Right Fruit
For the most vibrant and delicious flavor, fresh fruits will be your best companions. Ripe bananas, strawberries, or even a mix of seasonal berries can create a tasty blend. If you’re in a pinch, frozen fruits work too—just remember to thaw and drain them before blending!
Blend It Smooth
When making your homemade fruit roll ups, aim for a smooth consistency when pureeing the fruit. A high-powered blender will make this a breeze. You want a thick, smooth puree, as it ensures even drying and a delightful chewiness.
Cooking Temperature Matters
Set your oven to a low temperature—around 150°F (or 65°C). This slow drying process is crucial for getting that perfect texture. If the temperature is too high, you’ll end up with crispy fruit leather instead of chewy roll-ups.
Slice for Ease
After your roll-ups have cooled, slice them into strips for easy snacking. Use scissors for a clean cut, and consider wrapping them in wax paper for convenient storage.
With these tips in mind, you’ll craft delicious, personalized homemade fruit roll ups that might just become your new favorite snack!

Serving Suggestions for Homemade Fruit Roll Ups
When you’ve crafted your homemade fruit roll ups, the fun doesn’t stop there! These chewy snacks are incredibly versatile and can be enjoyed in various delightful ways:
- On-the-Go Snacks: Perfect for quick energy boosts during busy workdays or outdoor adventures.
- Lunchbox Delights: Brighten up your child’s lunch with a roll up tucked between sandwiches or snacks.
- Party Pleasers: Cut them into fun shapes and serve with yogurt for a colorful and healthy party platter.
- Baking Ingredient: Chop them into bits and fold them into muffin batters for a fruity twist.
No matter how you serve them, these homemade fruit roll ups are sure to impress!
Time Breakdown for Making Homemade Fruit Roll Ups
Making homemade fruit roll ups is a delightful way to enjoy the sweetness of fruits in a fun and chewy form. The process might seem daunting, but here’s a clear time breakdown to help you plan your adventure in fruit crafting.
Preparation time
About 15 minutes will set you up nicely. You’ll need to wash, peel, and chop your fruits into small pieces before blending.
Cooking time
Plan for approximately 4 to 6 hours of baking time. This slow drying process can be done while you go about your day, making it quite manageable.
Total time
In total, you’re looking at around 4 hours and 15 minutes to 6 hours and 15 minutes. This includes preparation and cooking, leaving you with delicious homemade fruit roll ups that are well worth the wait!
Nutritional Facts for Homemade Fruit Roll Ups
When you craft your own homemade fruit roll ups, you not only enjoy a fruity snack, but you also control the nutritional content. Understanding the nutritional breakdown makes this treat even more appealing.
Calories
Each serving of homemade fruit roll ups typically contains around 70-100 calories, depending largely on the types of fruits used. This means it’s a light, enjoyable snack that won’t weigh you down.
Sugar Content
The natural sugars derived from fruits in your homemade fruit roll ups can be a bit higher, averaging about 10-15 grams per serving. However, unlike processed snacks, these sugars are accompanied by essential nutrients.
Fiber Content
One of the best parts? You can expect about 2-3 grams of fiber per serving. This makes homemade fruit roll ups not only delicious but also a great option for digestion and prolonged energy.
Feel good about indulging in these fun, fruity snacks!
FAQs about Homemade Fruit Roll Ups
Creating homemade fruit roll-ups can be a delightful and rewarding experience, but you might have a few questions along the way. Here are some of the most frequently asked questions to help you enjoy your fruit roll-ups even more!
Can I use frozen fruit for these roll-ups?
Absolutely! Frozen fruit is a fantastic alternative if fresh options aren’t available. Just make sure to thaw and drain any excess moisture before blending. This helps you achieve that perfect fruity consistency without making your roll-ups too soggy. Whether it’s strawberries, blueberries, or mangoes, your taste buds won’t be disappointed!
How do I store homemade fruit roll-ups?
To keep your homemade fruit roll-ups fresh, roll them up in parchment paper and place them in an airtight container. This will protect them from picking up moisture and maintaining their chewy texture. If you want to keep them extra fresh, you can also refrigerate them!
How long do homemade fruit roll-ups last?
If stored correctly, homemade fruit roll-ups can last up to two weeks at room temperature. However, if you choose to refrigerate them, they could last for about three weeks. Just keep an eye on them, as freshness can vary based on the ingredients you use.
Embracing your inner chef while making easy and delicious homemade fruit roll-ups is fun, and with these answers, you’ll feel even more confident in your kitchen adventures!
Conclusion on Homemade Fruit Roll Ups
In summary, crafting homemade fruit roll ups not only brings delicious flavors to your kitchen but also allows you to control the ingredients. This means you can indulge in a sweet treat that’s both satisfying and healthy. Whether you opt for vibrant strawberries, tangy mangoes, or a mix of your favorite fruits, each roll up reflects your taste and creativity. Remember, the joy of making these treats lies not just in enjoying them but also in sharing with friends and family. So grab your fruits, unleash your culinary skills, and savor the goodness of these fruity delights!
Print
Fruit Leather
- Total Time: 4 hours 15 minutes
- Yield: Approximately 8 servings 1x
- Diet: Gluten-Free
Description
Delicious homemade fruit leather made from fresh strawberries or other fruit.
Ingredients
Scale
- 4 cups fresh strawberries (or other fruit), hulled and chopped
- 2–3 tablespoons honey or maple syrup
- 1 tablespoon fresh lemon juice
Instructions
- Prepare the fruit. Place the chopped strawberries into a blender or food processor. Blend until completely smooth. I like to pause and scrape down the sides to make sure there are no chunks left behind. The smoother the purée, the smoother your final fruit leather will be.
- Sweeten and brighten. Add honey and lemon juice to the purée. Blend again briefly to combine. Taste the mixture. If your berries are very sweet, you may need less honey. If they are slightly tart, add a touch more. This step reminds me of tasting jam as it simmers on the stove, adjusting it until it feels just right.
- Strain (optional). If you prefer an ultra-smooth texture, strain the mixture through a fine mesh sieve to remove seeds. This is optional but creates a polished finish.
- Spread evenly. Preheat your oven to 170°F (75°C) or the lowest setting available. Line a baking sheet with parchment paper or a silicone baking mat. Pour the fruit mixture onto the sheet and spread it evenly into a thin layer, about 1/8 inch thick. Try to keep the thickness consistent so it dries evenly.
- Bake low and slow. Place the tray in the oven and bake for 4–6 hours. The fruit should feel dry to the touch but still slightly tacky. It should not be wet in the center. This slow drying process concentrates the fruit’s natural sweetness and deepens the flavor beautifully.
- Cool and roll. Allow the fruit sheet to cool completely. Cut into strips using scissors or a sharp knife. Roll each strip with the parchment paper to create classic fruit roll-ups.
Notes
- Every time I make these, I am reminded how something so simple can feel so rewarding.
- Prep Time: 15 minutes
- Cook Time: 4 hours
- Category: Snack
- Method: Baking
- Cuisine: American
Nutrition
- Serving Size: 1 strip
- Calories: 50
- Sugar: 10g
- Sodium: 1mg
- Fat: 0g
- Saturated Fat: 0g
- Unsaturated Fat: 0g
- Trans Fat: 0g
- Carbohydrates: 13g
- Fiber: 1g
- Protein: 0g
- Cholesterol: 0mg